Showing posts with label DIY style. Show all posts

Monday, September 10, 2012

How do you do: Kate Spade "Cloverdale" Dots Rose Bowl...

As I mentioned in an earlier {post}, I purchased a round vase with the plans of tackling a DIY Kate Spade "Cloverdale" Dots Rose Bowl one day... well, I finally did it and here are the easy steps... 


Once you have your vase ready to go, you'll need gold gloss enamel paint and a brush with a tip that is about a 1/4 inch thick...


While I drew on the dots freehand, I would definitely say if you can find a stencil with the right size circles then GO FOR IT... once the painting is done, leave to dry for the required time as stated on the bottle... 


And finally a DIY well done... enjoy!!!

Photos and DIY via: An Obsession with Style

Monday, August 20, 2012

Obsession: The Antique Stove reinvented...

I apologize for the week late delay in posting; I was sick to the point that I couldn't move... but I am back and it feels good... As evidenced by my Etsy store, {Heirlooms NYC}, I love all things vintage and antique... and who doesn't love an Antique stove...


the weekend before I fell sick, I happened on a lovely idea for taking a wonderful looking antique stove that is otherwise not functional and making it into something that is actually quite purposeful...


While the majority of the stove can be used for storage without any tweaking, taking out the major mechanics and placing a great storage basket adds another area for use... and by placing a cut to fit cover on the burners, you now have a great space for displaying your favorite things... enjoy!!!

Photo #1 via: desire to inspire, Photo #2 & #3 via: An Obsession with Style

Monday, August 13, 2012

How do you do like: John Barrett's Ponytail Bar...

John Barrett's salon just got a little more action... ponytail action that is... 


Barrett's Ponytail Bar is the latest addition to the menu of services at this pie in the sky at Bergdorf Goodman...  


For those of you that can't make it the Ponytail Bar, watch this great how to {video} created by the salon... Happy Monday!!!

Photos via: Vogue, Video via: Daily Candy

Wednesday, August 8, 2012

How do you do: Wallpapered desk...

A few months ago, I {blogged} about moving a desk in my apartment from one room to another and found the lovely idea of refreshing it with some wallpaper... due to the unbearable heat this past weekend, I decided to tackle this DIY... instead of wallpaper, I found this cool vintage inspired shelf liner which was great to use since it had a grid on its back to measure and cut straight lines... so I gathered a pencil, scissors, shelf liner and got to work... 


Using the shelf liner was also easier since it is self-adhesive which means if you lay a piece down and it doesn't work, you can just peel it off without any residue left behind... also great to use if you want to update the desk again in the future, all you do is peel it off and add on a new design... after cutting and placing the pieces to match the different angles of the desk, I ended up with a brand new desk... 


I promise more pictures once the desk is put in its place and decorated... see you Friday!!!

Photos and DIY via: An Obsession with Style

Monday, August 6, 2012

How do you do: Dressing up the little black dress...

When one party invite arrives, the rest follow in a domino effect... while it's wonderful to go out and buy something new for each affair, an endless wardrobe of party dresses is not what I want to fill my closet with... a great pair of shoes or an amazing bag will get more wear than the one-off outfit... so what's a girl to do but think of something new... 


The love idea of spray painting faux flowers, stitching them onto a ribbon which is then pinned to a strapless dress... not so artistic, adorn your dress with a cluster of vintage gold brooches... the possibilities are endless with a little creativity... enjoy!!!

Photo and faux flower idea via: once wed

Friday, May 18, 2012

How do you do: Mini salt and pepper shakers...

This a special DIY for the small space dweller, for the person who likes small things and a sweet decorative touch for any celebration... 


The next time you have an opportunity to swipe ... oops, I mean come across... some little jam jars, make them your own... 


With a hammer and some thin nails, pound some holes into the lids... pour in your salt or pepper, and it's that easy... have a wonderful weekend!!!

DIY and Photos via: sweet paul

Monday, February 6, 2012

How do you do: Antique button bracelet...

As one who has a few antique buttons, I always wondered what could I possibly do with a collection of inconsistent buttons... Mismatched sets sometimes just don't work and odd numbers are just that, odd.. Beautiful to look at with exquisite details these buttons are screaming for attention, and now I have the most wonderful idea of how to work them into something timeless and chic... 


The DIY that I gathered this idea from didn't include any steps, so here is my attempt at assisting this project along: 

1. Gather some of your favorite antique buttons- the number of buttons you use depends on how much of the bracelet you want to cover, but keep in mind that you will be tying on ribbon to use as a closure
2. Using a piece of cord- whether leather or hemp, string on the buttons in the order you want to display them
3. Cut and tie the cord at each end of the button adorned cord
4. Using a piece of ribbon; two pieces for each end, long enough to double, insert ribbon through the last button loop on each end


Tie your bracelet on and enjoy!!!

DIY & Photos via: sweet paul

Wednesday, January 25, 2012

How do you do: Doily corsage...

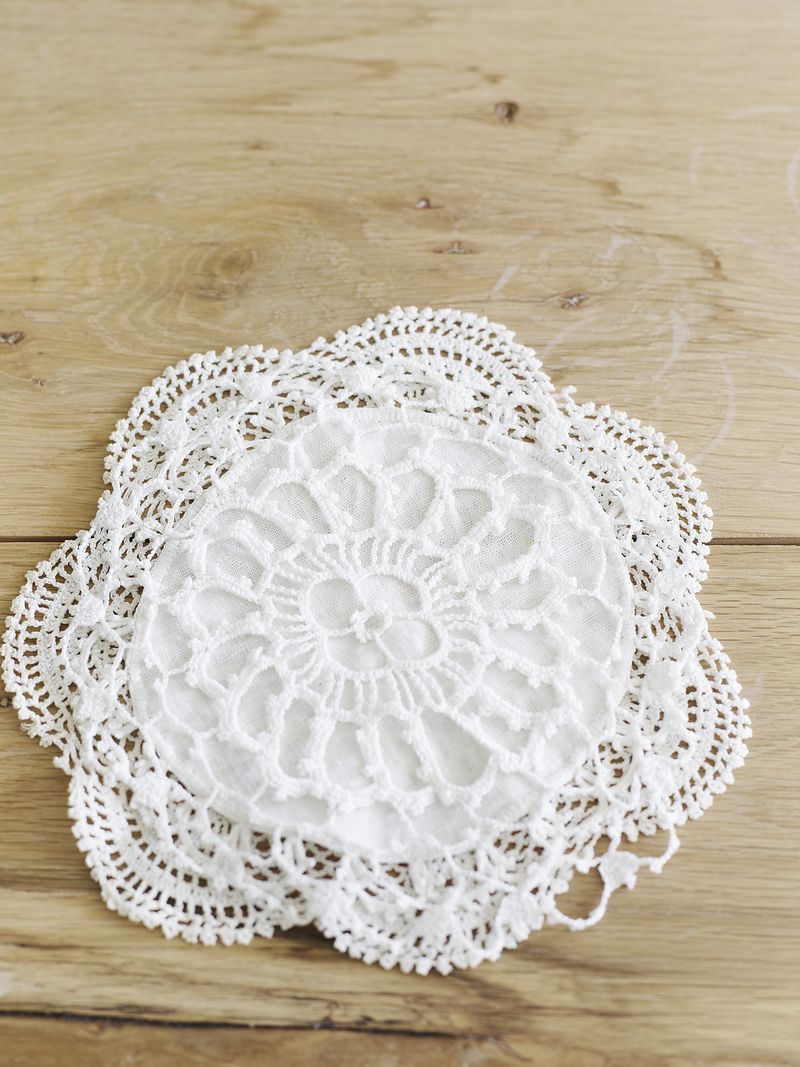
Growing up, my house was filled with doilies my grandmother made...  some doilies dressed up tables while some were framed... 


looking for something new to do with these doilies, I love the idea of using them to make a gorgeous corsage pin...  so gather those doilies and let's begin...


Step one: Take two doilies and place one on top of the other.
Step two: Roll them together like a loose cone and fasten with a piece of string.
Step three: Cut off the bottom, just below the string. If you're using doilies of sentimental value and don't want to cut off the bottom then I would suggest flattening the bottom as flat as possible for the next step. 
Step four: Hot glue a pin in place. 


Enjoy!!!

Photos and DIY via: sweetpaul

Friday, December 16, 2011

How do you do: Decorative pom poms...


Decorating for the holidays doesn't have to be so obvious especially when the atmosphere goes from Christmas to New Years in a one week span... these decorative pom poms are sure to take your decor through the holiday season and into next year...


Follow these easy steps here to create your own decorative pom poms:
Supplies: Fabric, scissors, hot glue gun, and chinese lanterns 

Step 1: Cut circles out of fabric.
Step 2: Fold the circle in half and put a little hot glue on the center, then fold over to secure.
Step 3: Apply more hot glue to the bottom of the folded circle.
Step 4: Press the bottom of the folded circle with the hot glue onto the chinese lantern.
Step 5: Repeat these steps until the whole lantern is covered. Once finished, attached some fabric to the metal frame of the lantern to hang.


See you Monday!!!

Photo #1 via: Kate Osborne Photography, Photo #2, #3 & #4 and DIY via: OnceWed

Monday, December 12, 2011

How do you do: Chandelier...


Tis the season to get your home ready for the holidays...  but at this time elaborate upgrades may be out of reach... 


with this DIY rock candy chandelier, you can still add some bling to your home on a moment's notice... enjoy!!! 

Supplies: Rock Candy Strings, Bailing wire (16 gauge, 1.5 inches for each), Seam binding or ribbon (about 10″ for each,  1/2″or so wide), Wire cutters, Scissors, Hot glue gun and glue sticks


DIY:  1.  Begin by using your wire cutters to cut 1.5 inch lengths of wire.  You’ll need one per crystal.  (see figure 1)
2.  Bend your wire into a “Shepard’s hook” shape.  (see figure 1)
3. At the very end of one of the rock candy strings, put a generous glob of hot glue.  Stick the end of the hook into the glue, and hold until it has cooled.    If it wiggles a bit, add another dab to secure it.   (see figure 2)
4.  Cut a length of ribbon, about 10 inches long and tie a knot, then a bow around the wire at the top of the crystal.  Trim your ribbon tails.
5. Hang your completed crystals anywhere that needs a little sparkle; on bare branches in a vase, from a tree, in a floral arrangement,  from garland or an arch.  If you’re feeling extra crafty, construct an armature and hang the crystals from it like a chandelier.
A Tip:
If you have a lot of short candy strings, you can join them together using hot glue to make longer strands

Photo #1 via: Richard Israel, DIY and Photo # 2 & # 3 via: oncewed

Tuesday, November 29, 2011

All wrapped up...

My favorite thing to wear with the turn of seasons is a great scarf... 


Change things up this season by wrapping your scarf a new way... For some inspiration, check out this cool {step by step} featured on who what wear... mixing it up this week, see you Friday... enjoy!!!

Photo #1 via: hel-looks, Photo #2 via: wayne tippetts, DIY via: whowhatwear

Wednesday, November 23, 2011

Old treats with new tricks...

I have an expanding folder of recipes... there are recipes that are elaborate and require time... there also some that are quick and easy, yet elegantly done...  I plan to cheat a little on dessert this Thanksgiving with a great tip I collected from {Martha Stewart}...


DIY: Turn a half-gallon tub of Neapolitan ice cream into a decadent bombe by dripping plenty of dark chocolate over it. 
First, cut the carton off the ice cream. Refreeze it until it hardens, and then pour slightly cooled melted semisweet chocolate over the top, and let it drip down the sides; refreeze once more. When the topping is set, arrange the bombe on a fancy serving platter and scatter chunky chocolate bits on top and around it for an added flourish.
Have a wonderful Thanksgiving!!!
Photo and DIY via: Martha Stewart

Friday, November 11, 2011

How do you do: Face framing braid...

A graceful braid turns the simplest of outfits up a notch... 


Let this look take you from day to night... here's how: 

Center-part hair; braid the front sections. Bring braids to meet and pin together. Roll unbraided hair over braids; pull through and pin... 

See you Monday!!!

Photo #1 & #2 via: sss, DIY via: Lucky

Wednesday, April 13, 2011

How do you do: Feather headband...


An exuberant headband is a sure way to give your look an extravagant flair... follow these steps to make yourself a standout piece... enjoy!!!


Materials & tools
-2 Different trims, both measuring from ear to ear, across forehead
-1 Ribbon, circumference of head
-1.5” Piece of ¼” elastic
-Needle & thread
-Hot glue gun and glue
-Scissors
Instructions

Steps 1 & 2-Start with ribbon, glue edge and fold it over a ¼”.
Step 3-Center elastic on ribbon and glue down a ¼” in from folded edge


Step 4-Glue along folded edge, overtop of the elastic, and fold in again, a ¼”. Then, fold and glue elastic back over itself, as pictured.
Step 5-Repeat steps 1-4 on other end of ribbon, joining the ends together.
Step 6 & 7-Layout trims and find centers of headband and bottom trim by folding in half, then tack together at centers with hot glue.


Step 8-Finish gluing bottom trim into place slowly, only gluing inch by inch, because hot glue dries quickly and you want to avoid any lumps or bumps.
Step 9-Stitch and gather headband ribbon just behind the edge of first trim, repeat on opposite side
Steps 10-11-Glue finishing trim onto first trim, slowly gluing and placing for a nice and even finish.


Photo #1 via: The Coveteur, DIY & photos via: oncewed

Thursday, March 10, 2011

How do you do: Topknot...

For an easy yet elegant look, a topknot is the goto hairstyle for every occasion... 


Follow these simple DIY tips for a gorgeous topknot: 

Pull and secure dry hair into a tight, high ponytail. Twist the length until it coils into a small bun and pin it down. 

Photo #1 via: Craig Arend, Photo #2 via: souvenirs, Photo #3 via: Hanneli Mustaparta, Photo #4 via: Wayne Tippetts, DIY via: Elle

Thursday, March 3, 2011

How do you do: Curly hair...


Even though I do wear my hair straight often enough for everyone to think 
my hair is naturally so, those near and dear to me know that my hair is naturally curly... 

Styling curly hair takes the right products and tools... when done right, the look is perfection...


Whether you were born with it or need a little help, here's an easy DIY for bouncy, shiny curls:

Create a side part {or part hair as you like}. Use a larger barrel iron for the front two inches of hair and a half-inch curling iron for the rest of the head. Shake out with fingers and spritz with hairspray to hold. 

Photo #1 & #2 via: FGR, Photo #3 via: Wayne Tippetts, Photo #4 via: Stockholm Street Style, DIY via: Elle

Wednesday, June 2, 2010

Wednesday's Chalkboard styling...


Over the weekend, I stopped in at a quaint market store and fell head over heels with the chalkboard shelves inscribed with chalk descriptions... while chalkboard menus have become a common feature in stores and restaurants alike, I was truly inspired by this different twist on the labeling of shelves... I think this would be a great DIY project for a kitchen with open shelves...

Photos via: An Obsession with Style
Related Posts Plugin for WordPress, Blogger...